Importing references
You rarely type BibTeX by hand in bibtui. There are five ways to add an
entry — by DOI, from a PDF, from a .bib file, by pasting raw BibTeX, or
manually — and all of them refuse to create duplicate cite keys.
Press n to open the "New Entry" chooser, then pick one with its
mnemonic key: d import by DOI, p import from PDF,
b import a .bib file, v paste BibTeX, or m
fill out manually. The number keys 1–5 work too.
Create a new entry
Press n then m to open the new-entry form. Pick the entry
type (article, book, inproceedings, …) and the form shows that type's fields
under their real BibTeX names: required fields are marked with * and
listed in the hint under the type selector, then doi, url and note, then
the remaining optional fields.
The cursor starts in the first field (usually the author) rather than the cite
key, because the key is filled in for you: it's suggested automatically from the
author and year (in AuthorYear form) and shown dimmed and italic while
auto-generated, so you can see at a glance that it will follow the author/year.
Type your own key any time to take over; the styling switches to a normal key
and stops auto-updating.
Every new entry is stamped with a date-added timestamp automatically, so the
Added column and date sorting work straight away — you never enter it by
hand. When you save, the entry is validated with the BibTeX parser first, so a
malformed cite key or field can't be written to your .bib file.
Switching the entry type re-shapes the form to match the new type while keeping any values you already typed.
Keywords are managed separately
The form doesn't include a keywords field — keywords are curated in the keywords picker (k), which lets you reuse the ones already in your library. Add the entry first, then press k.
Custom fields
Need a field the form doesn't show — isbn, urldate, eprint, or anything
else? At the bottom of the form, pick one from the Common field dropdown or
type any field name and press Enter (or Add). It appears as a new
input you can fill in, and the ✕ button removes it again. Any field
name is accepted, so you're never limited to the built-in list.
What gets checked when you write
When you press Ctrl+S (or Write), bibtui validates the
entry before it touches your .bib file. There are three levels:
- Auto-fixed — small corrections are applied for you and shown in the form
(the fixed inputs are highlighted, and you press Write once more to confirm):
a
12-23page range becomes12--23, ahttps://doi.org/…DOI is reduced to the bare identifier, and bare&,%,#in text fields are escaped to\&,\%,\#. Intentional LaTeX and maths ($…$,_,\&that's already escaped) and accented Unicode are left exactly as you typed them. - Flagged — surfaced as a warning but never blocks the write, e.g. an
implausible
year(outside ~1450–next year). - Blocked — the entry is not written and the offending fields are outlined
in red: a missing required field for the entry type (e.g.
journalon an@article), a missing or non-numericyearwhere the type requires one, or a cite key that is empty, contains spaces, or wouldn't parse as valid BibTeX.
The same checks run when you edit an existing entry (e), so
editing feels identical to adding — with one deliberate difference: a required
field that was already empty (or a year that was already non-numeric) when
you opened the entry is only flagged, never blocked, so you're never trapped
fixing an unrelated field in a messy entry. This validation only ever runs in
the form; opening a .bib file never validates or rejects anything.
Import by DOI
Press n then d, paste a DOI, and bibtui fetches the full metadata online and builds the entry for you.
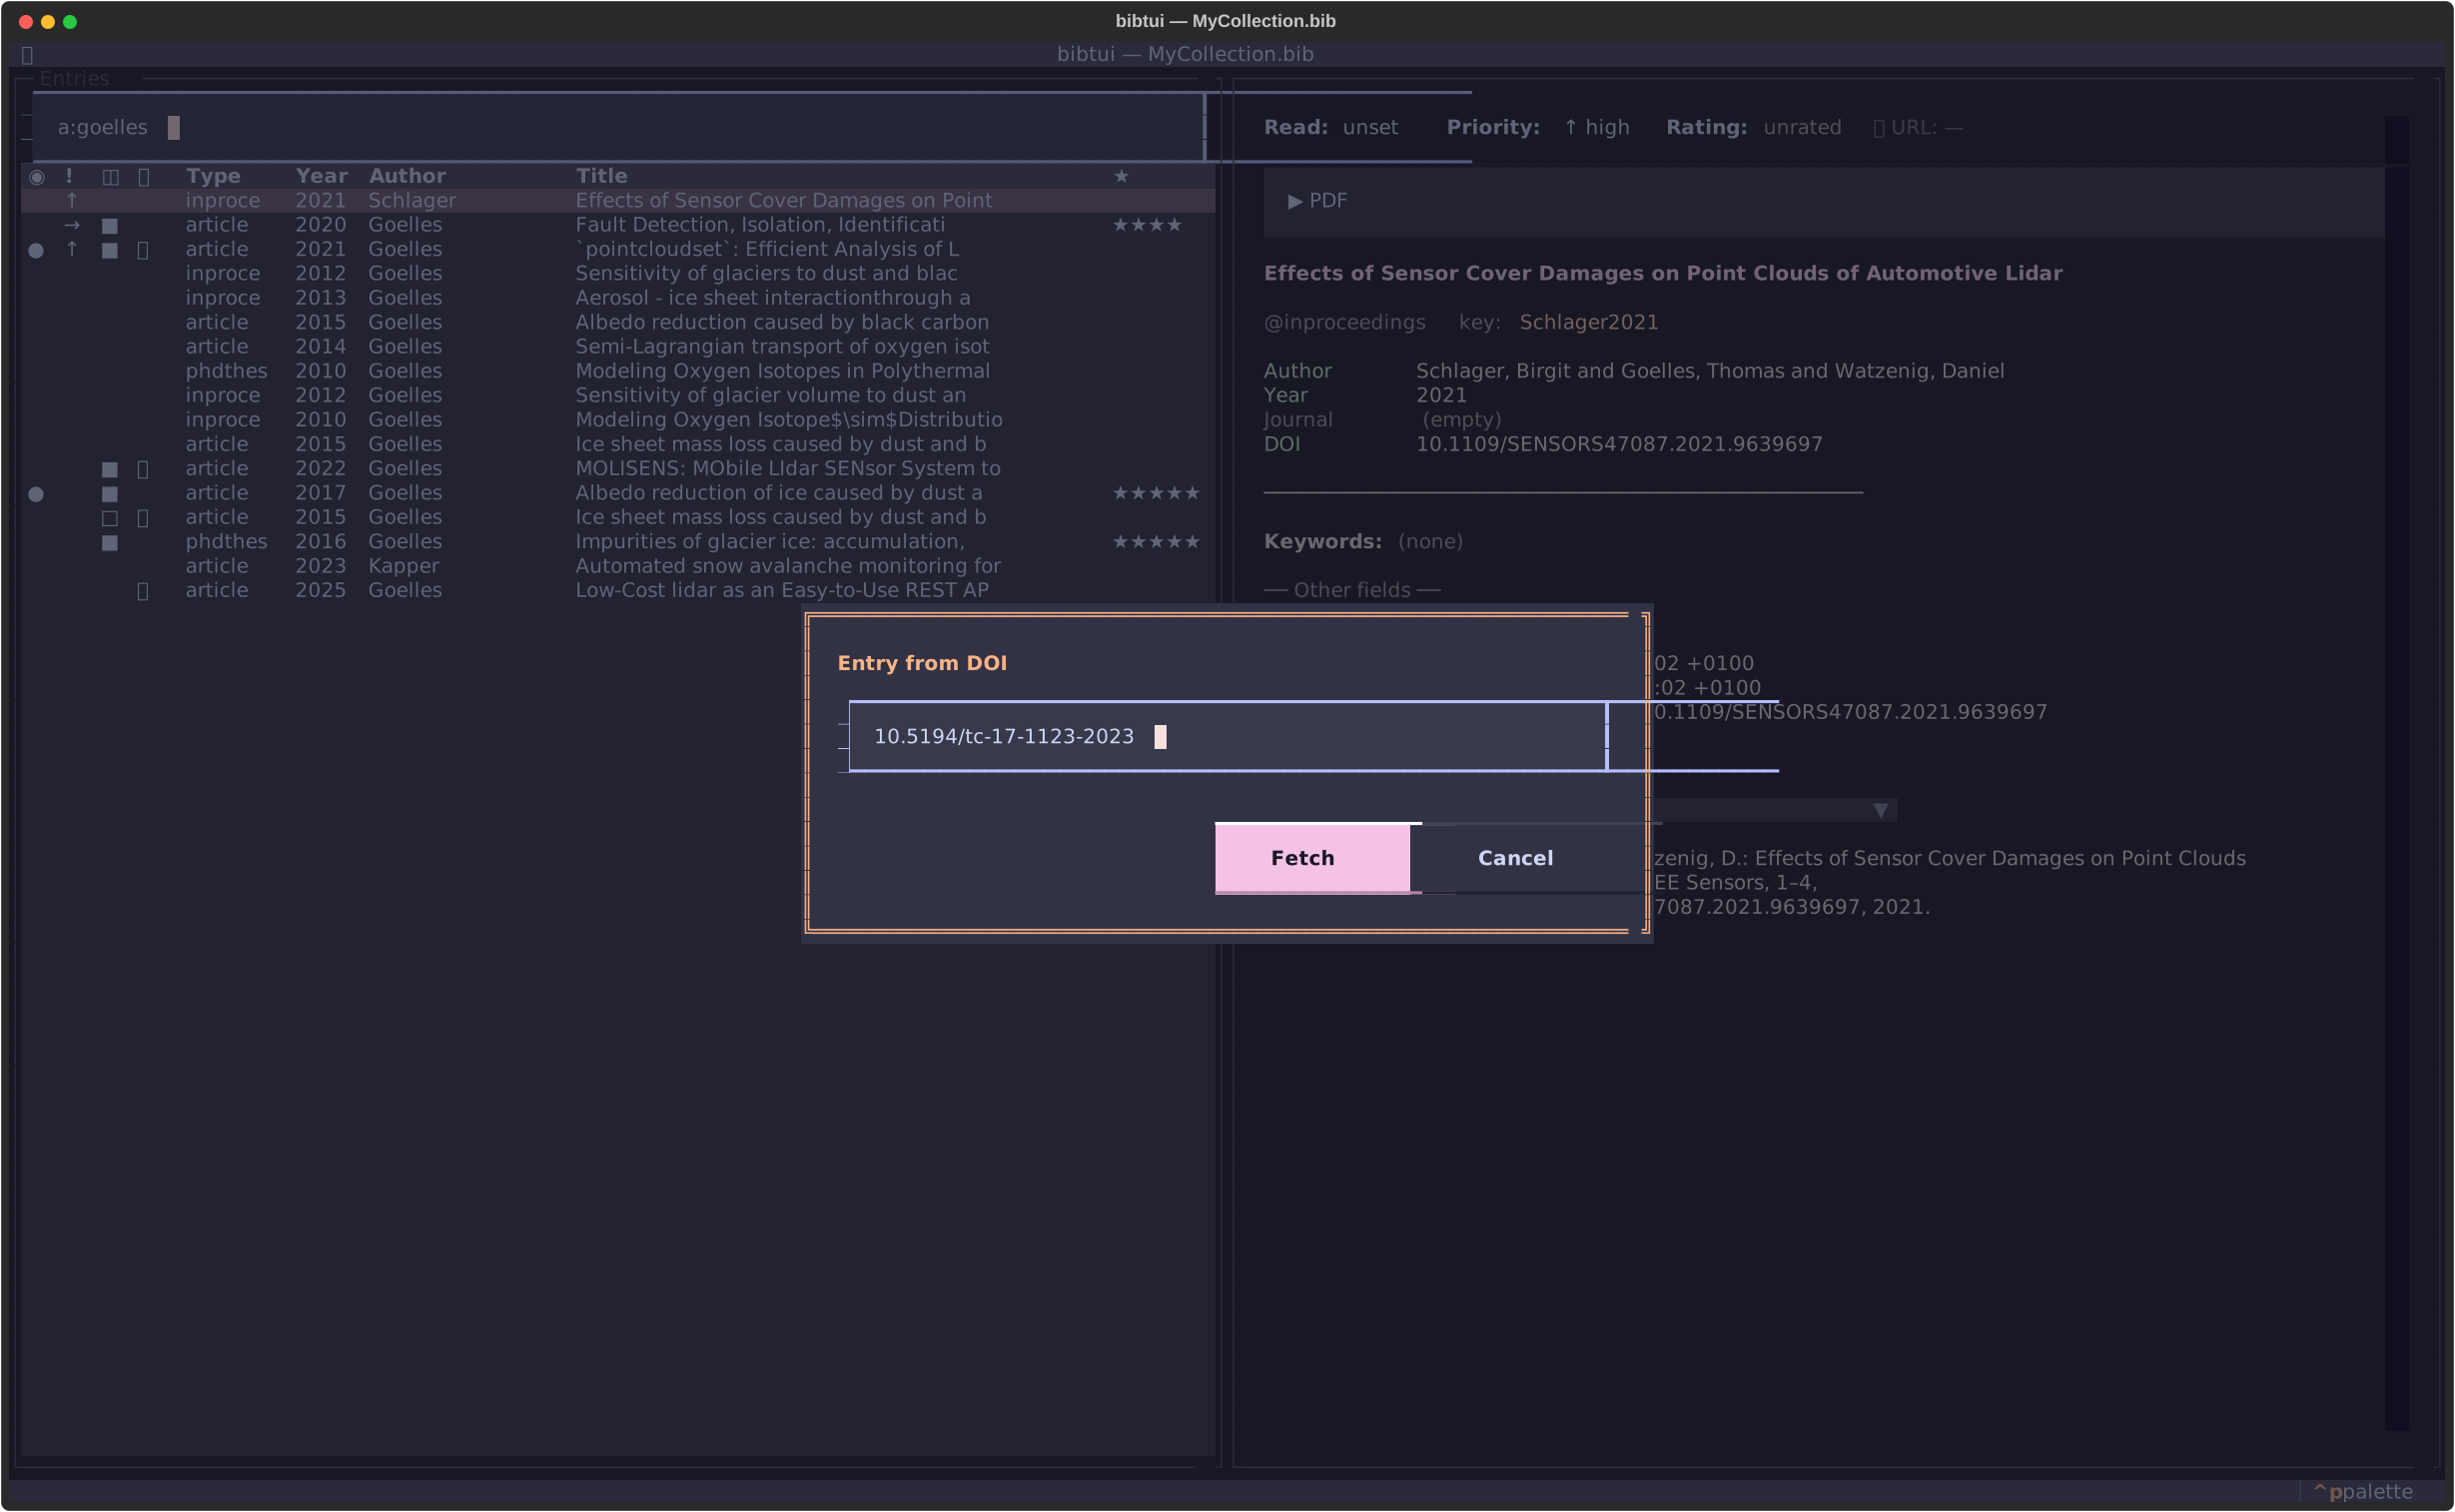
This is the quickest way to add a paper you found in a browser or a reference list — copy the DOI, press n then d, paste, done.
PDFs are fetched automatically
With Auto-fetch PDF on import enabled (the default), bibtui downloads the open-access PDF right after import — so a DOI often becomes a fully-linked entry, PDF and all, in one step. It needs a DOI or URL on the entry and a PDF directory set. Turn it off in settings if you'd rather fetch manually with the PDF actions menu (p then f).
Import from PDF
Press n then p to build entries straight from PDF files already on disk — handy for clearing out an old downloads folder or a migrated Papers/Zotero library. The picker reuses "Add PDF"'s browse-and-filter list (it defaults to the configured download directory; paste a different folder path in to browse elsewhere) but as a checklist, so you can pick several files at once instead of one per entry.
Each selected PDF is scanned for a DOI or arXiv id — first in the embedded document metadata, then in the text of its first two pages — and the identifier is validated and its metadata fetched through the same CrossRef pipeline as "Import by DOI". Nothing is written until you confirm: a report screen lists every file with a ✓/✗ mark and the reason a file failed (an ambiguous file's candidate DOIs are shown too, so you can copy one out and use "Import by DOI" yourself). Press Space on any row, success or failure, to preview its PDF. One "Import N Entries" click then commits every ✓ row at once.
- If the DOI already matches an entry in your library, no duplicate entry is created; if that entry has no PDF linked yet, this PDF is linked to it (✓) instead of being silently skipped — including duplicate PDFs within the same selection.
- If the exact same PDF (by content, not filename) is already sitting in your configured PDF folder under any name, it's reused instead of being copied in again; otherwise matched PDFs are moved into the PDF folder and linked, the same as "Add PDF".
- Files with no extractable text, or where CrossRef can't be reached, are reported per-file and never block the rest of the batch.
Import a .bib file
Press n then b to import a downloaded .bib file — for
example the "Download citation" link on a journal page. The picker is the same
browse-and-filter list as "Import from PDF"/"Add PDF" (it defaults to
~/Downloads; paste a folder path in to browse elsewhere; Space
previews the highlighted file, Enter/x choose it), just
for a single .bib file instead of a PDF checklist.
A file with one entry is added directly — no review screen, same as "Import by
DOI". A file with several entries shows a report first: ✓ for a new entry, ✗
for one already in your library (matched by DOI, including a duplicate DOI
within the same file) — entries without a DOI are always treated as new.
Space previews the source .bib file itself (every row comes from
the same file). One "Import N Entries" click commits every ✓ row. It reuses
the same parser that loads your main library, so there's no size limit beyond
what a .bib file can hold.
Paste raw BibTeX
If you already have a BibTeX snippet (for example from a publisher's "cite this"
button or Google Scholar), press Ctrl+V to paste it
directly as a new entry — or press n then v and paste
into the prompt. Like entries created with the form, pasted entries are
stamped with a date-added timestamp automatically if they don't carry one.
Cite-key conflicts
Every method checks your library for an existing entry with the same cite key:
- If a different paper already uses the key, bibtui assigns the next free
lowercase suffix —
Goelles2025, thenGoelles2025a,Goelles2025b, and so on. - If the key and title match an existing entry, the import is rejected as a duplicate, so you don't end up with the same paper twice.
Unify cite keys
Imported references can arrive with inconsistent keys. From the command palette
(Ctrl+P) choose Library: Unify citekeys (AuthorYear) to
normalise every key to the AuthorYear convention. Entries that already match
are left untouched.
Warning
Changing cite keys can break \cite{...} references in existing LaTeX
documents. Run this on a fresh library, or be ready to update your
manuscripts — and since your .bib is under
version control, you can always review the diff first.